Wrapping a C Library in Swift
Learn how to wrap C libraries in Swift for safe, ergonomic embedded Linux development
Wrapping C Libraries in Swift
When developing embedded Linux applications for robotics and physical AI, working with C and C++ libraries is a fact of life. Hardware drivers, computer vision libraries, and system-level APIs are predominantly written in C and C++. However, this doesn't mean you have to write everything in these languages. Memory safety and ergonomics are critically important, especially when controlling physical hardware.
Swift provides excellent C and C++ interoperability, allowing you to leverage existing libraries while writing safe, expressive code. This guide shows you how to wrap C libraries in Swift using a real-world example.
See Grayskull in Action: Want to see what Grayskull can do before diving in? Check out the interactive browser demo where you can test computer vision operations in real-time.
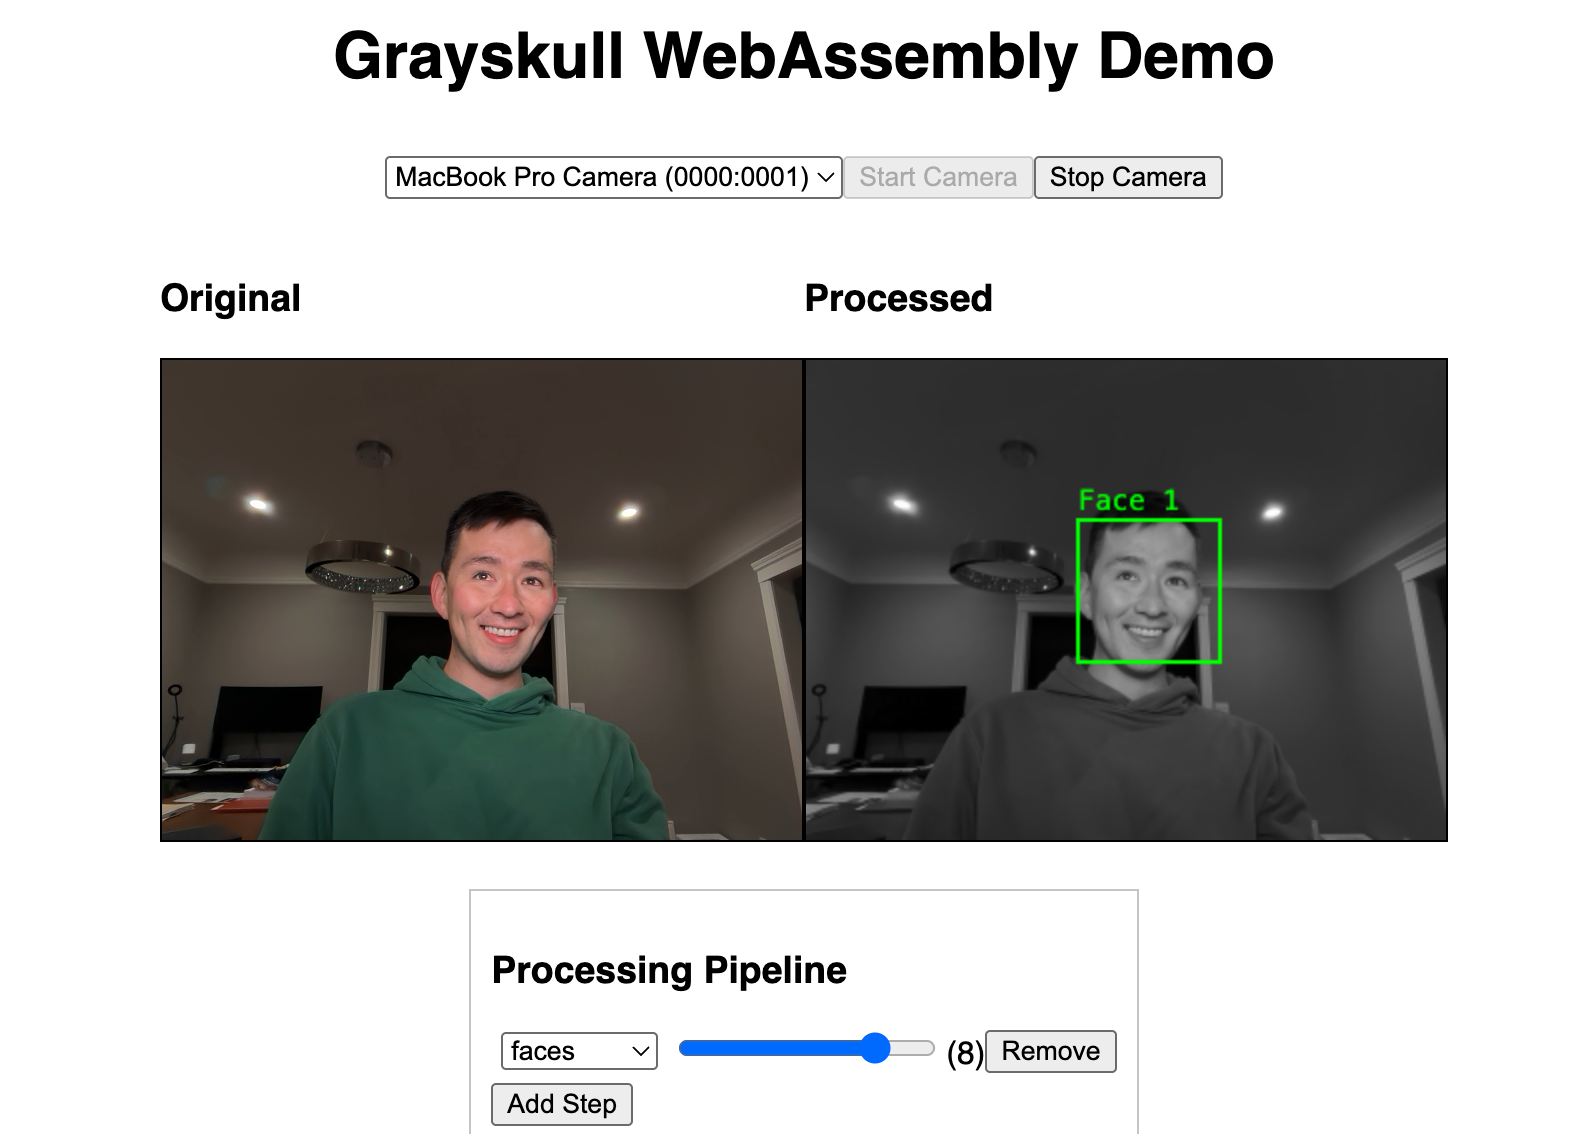
Example of Grayskull's computer vision operations: original image, edge detection, thresholding, and feature detection
Why Wrap C Libraries in Swift?
Memory Safety: Swift's automatic reference counting (ARC) and type system prevent common C bugs like use-after-free, null pointer dereferences, and buffer overflows.
Ergonomics: Swift's modern syntax, optional types, and value semantics make code easier to read, write, and maintain compared to manual memory management in C.
Performance: Swift's interop layer has zero overhead. You get C-level performance with Swift-level safety.
Best of Both Worlds: Use battle-tested C libraries for low-level operations while keeping your application logic in safe, maintainable Swift.
Swift's C/C++ Interoperability
Swift has excellent C and C++ interoperability, especially in Swift 6.2 which includes:
- Direct C/C++ header imports: Import C headers directly into Swift without writing bridge code
- Virtual methods support: Call C++ virtual methods on reference types from Swift
- Smart pointer support: Work with
std::unique_ptrand other modern C++ idioms - Safe interoperability mode: Handle pointers and view types like
std::spansafely - Bidirectional calling: C/C++ can call Swift functions and use Swift types
For comprehensive documentation, see the official Swift C++ Interop guide.
Real-World Example: Grayskull Computer Vision Library
Let's walk through wrapping Grayskull, a tiny, dependency-free computer vision library designed for embedded systems. We'll use grayskull-swift as our example.
Why Grayskull?
Grayskull is perfect for embedded Linux applications:
- Tiny footprint: No dependencies, minimal binary size
- Zero allocations: Many operations require no heap allocations
- SIMD-friendly: Optimized for ARM processors on Jetson and Raspberry Pi
- Header-only: Easy to integrate into any project
But Grayskull is written in C, with manual memory management and pointer-heavy APIs. We'll wrap it in Swift to make it safe and ergonomic.
Project Structure
Our Swift wrapper will use a git submodule to include the C library:
grayskull-swift/
├── Sources/
│   └── Grayskull/          # Swift wrapper code
│       ├── Image.swift
│       ├── ImageStorage.swift
│       └── Operations.swift
├── Tests/
│   └── GrayskullTests/     # Swift tests
├── grayskull/              # Git submodule (C library)
│   ├── grayskull.h
│   └── grayskull.c
└── Package.swift           # Swift Package Manager manifest
Step 1: Adding the C Library as a Submodule
First, add the C library as a git submodule:
mkdir grayskull-swift
cd grayskull-swift
git init
git submodule add https://github.com/zserge/grayskull.git grayskull
When others clone your repository, they'll need to initialize submodules:
git clone --recurse-submodules https://github.com/yourusername/grayskull-swift.gitOr if they've already cloned:
git submodule update --init --recursiveSwift Package Manager Handles Submodules: When using your package as a dependency via Swift Package Manager, submodules are handled automatically. Developers don't need to manually initialize them.
Step 2: Configure Package.swift
Create a Package.swift that bridges the C library and exposes it to Swift:
// swift-tools-version: 6.0
import PackageDescription

let package = Package(
    name: "Grayskull",
    platforms: [
        .macOS(.v13),
        .linux,
    ],
    products: [
        .library(
            name: "Grayskull",
            targets: ["Grayskull"]
        ),
    ],
    targets: [
        // C library target
        .target(
            name: "CGrayskull",
            path: "grayskull",
            sources: ["grayskull.c"],
            publicHeadersPath: ".",
            cSettings: [
                .headerSearchPath("."),
            ]
        ),
        // Swift wrapper target
        .target(
            name: "Grayskull",
            dependencies: ["CGrayskull"]
        ),
        // Tests
        .testTarget(
            name: "GrayskullTests",
            dependencies: ["Grayskull"]
        ),
    ]
)
Why a Separate CGrayskull Target?
You might wonder why we need a separate CGrayskull target instead of importing the C headers directly into our Swift code. Here's why:
1. Clean Module Boundaries: The CGrayskull target creates a proper Clang module that Swift can import. This tells the Swift compiler exactly which headers are part of the public API and how to compile the C code.
2. Build System Integration: Swift Package Manager needs to know:
- Which C files to compile (
sources: ["grayskull.c"]) - Where the headers are located (
publicHeadersPath: ".") - What compilation flags to use (
cSettings) - How to link everything together
3. Header Management: By specifying publicHeadersPath, we control which C headers are exposed to Swift. This is crucial for:
- Keeping internal implementation details private
- Avoiding namespace pollution
- Managing complex header dependencies
4. Cross-Platform Compilation: The C target handles platform-specific compilation:
- Different compilers (Clang on macOS/Linux, GCC on some systems)
- Platform-specific flags and optimizations
- Architecture-specific code paths (ARM64 on WendyOS)
5. Dependency Management: Swift Package Manager can automatically:
- Fetch git submodules
- Build the C library before Swift code
- Handle transitive dependencies
- Cache compiled C code for faster builds
Without the separate target, you'd need to manually manage C compilation, header paths, and linking, which is error-prone and platform-specific. The CGrayskull target encapsulates all of this complexity into a single, declarative configuration.
Step 3: Create a Safe Swift Wrapper
Now we'll wrap the C API in safe Swift. Let's say Grayskull has this C function:
// C API (unsafe)
gs_image* gs_image_create(int width, int height);
void gs_image_destroy(gs_image* img);
uint8_t gs_image_get_pixel(gs_image* img, int x, int y);
void gs_image_set_pixel(gs_image* img, int x, int y, uint8_t value);
We'll wrap it in Swift with automatic memory management:
import CGrayskull

/// A grayscale image with automatic memory management
public struct GrayskullImage: Sendable {
    // Private storage with reference counting
    private let storage: ImageStorage

    public let width: UInt32
    public let height: UInt32

    /// Create a new image with the given dimensions
    public init(width: UInt32, height: UInt32) {
        guard let rawImage = gs_image_create(Int32(width), Int32(height)) else {
            fatalError("Failed to create image")
        }

        self.storage = ImageStorage(rawImage: rawImage)
        self.width = width
        self.height = height
    }

    /// Get/set pixel value at coordinates using subscript
    public subscript(x: UInt32, y: UInt32) -> UInt8 {
        get {
            precondition(x < width && y < height, "Pixel coordinates out of bounds")
            return storage.withRawImage { rawImage in
                gs_image_get_pixel(rawImage, Int32(x), Int32(y))
            }
        }
        set {
            precondition(x < width && y < height, "Pixel coordinates out of bounds")
            storage.withRawImage { rawImage in
                gs_image_set_pixel(rawImage, Int32(x), Int32(y), newValue)
            }
        }
    }
}
Step 4: Implement Thread-Safe Storage
The ImageStorage class handles memory management and thread safety:
import CGrayskull

#if canImport(Darwin)
import Darwin
#else
import Glibc
#endif

/// Thread-safe reference-counted storage for raw C images
final class ImageStorage: @unchecked Sendable {
    private let rawImage: UnsafeMutablePointer<gs_image>

    #if canImport(Darwin)
    private let lock = os_unfair_lock_t.allocate(capacity: 1)
    #else
    private var mutex = pthread_mutex_t()
    #endif

    init(rawImage: UnsafeMutablePointer<gs_image>) {
        self.rawImage = rawImage

        #if canImport(Darwin)
        lock.initialize(to: os_unfair_lock())
        #else
        pthread_mutex_init(&mutex, nil)
        #endif
    }

    deinit {
        // Clean up the C resource
        gs_image_destroy(rawImage)

        #if canImport(Darwin)
        lock.deinitialize(count: 1)
        lock.deallocate()
        #else
        pthread_mutex_destroy(&mutex)
        #endif
    }

    func withRawImage<T>(_ body: (UnsafeMutablePointer<gs_image>) throws -> T) rethrows -> T {
        #if canImport(Darwin)
        os_unfair_lock_lock(lock)
        defer { os_unfair_lock_unlock(lock) }
        #else
        pthread_mutex_lock(&mutex)
        defer { pthread_mutex_unlock(&mutex) }
        #endif

        return try body(rawImage)
    }

    func makeUnique() {
        // Create a copy of the underlying C image
        withRawImage { original in
            // Implementation depends on C library's copy function
            // gs_image_copy(original)
        }
    }
}
What This Achieves:
- Automatic cleanup:
deinitcallsgs_image_destroywhen the last reference goes away - Thread safety: Operations on the C image are protected by locks
- Value semantics: Copy-on-write ensures Swift's value semantics work correctly
- Platform compatibility: Uses
os_unfair_lockon Darwin,pthread_mutexelsewhere
Step 5: Add High-Level Operations
Now we can add ergonomic, functional-style operations:
extension GrayskullImage {
    /// Apply Sobel edge detection
    public func sobel() -> GrayskullImage {
        let result = GrayskullImage(width: width, height: height)

        storage.withRawImage { srcImage in
            result.storage.withRawImage { dstImage in
                gs_sobel(srcImage, dstImage)
            }
        }

        return result
    }

    /// Apply threshold to create binary image
    public func thresholded(_ threshold: UInt8) -> GrayskullImage {
        let result = GrayskullImage(width: width, height: height)

        storage.withRawImage { srcImage in
            result.storage.withRawImage { dstImage in
                gs_threshold(srcImage, dstImage, threshold)
            }
        }

        return result
    }

    /// Chain operations functionally
    public func processed() -> GrayskullImage {
        return self
            .sobel()
            .thresholded(128)
    }
}
This enables clean, functional-style image processing:
let edges = image.sobel().thresholded(128)Step 6: Add Utility Methods
Add useful utility methods for working with images on Linux:
extension GrayskullImage {
    /// Create image from raw grayscale data
    public init?(data: [UInt8], width: UInt32, height: UInt32) throws {
        try self.init(width: width, height: height, data: data)
    }

    /// Export image to raw grayscale data
    public func toData() -> [UInt8] {
        var result: [UInt8] = []
        withPixelData { pixels in
            result = pixels
        }
        return result
    }

    /// Save image to PGM file (simple grayscale format)
    /// Note: Grayskull-Swift includes this as `savePGM(to:)` on desktop platforms
    public func savePGM(to path: String) throws {
        #if os(macOS) || os(Linux)
        // The actual grayskull-swift library provides this method
        // Implementation writes PGM format (portable graymap)
        var output = "P5\n\(width) \(height)\n255\n"
        let data = toData()
        let dataString = String(data: Data(data), encoding: .isoLatin1) ?? ""
        output += dataString
        try output.write(toFile: path, atomically: true, encoding: .isoLatin1)
        #else
        fatalError("PGM export only available on desktop platforms")
        #endif
    }

    /// Load image from PGM file
    /// Note: Grayskull-Swift provides `init(contentsOfPGM:)` for this
    public init(contentsOfPGM path: String) throws {
        // The actual library implementation
        let content = try String(contentsOfFile: path, encoding: .isoLatin1)
        let lines = content.split(separator: "\n")

        guard lines.count >= 3,
              lines[0] == "P5",
              let dimensions = lines[1].split(separator: " ").compactMap({ UInt32($0) }),
              dimensions.count == 2 else {
            throw NSError(domain: "GrayskullError", code: 1, userInfo: [NSLocalizedDescriptionKey: "Invalid PGM format"])
        }

        let width = dimensions[0]
        let height = dimensions[1]

        let headerEnd = content.range(of: "255\n")?.upperBound ?? content.startIndex
        let imageData = content[headerEnd...].data(using: .isoLatin1) ?? Data()
        let pixels = [UInt8](imageData)

        try self.init(width: width, height: height, data: pixels)
    }
}
These utilities let you work with images on embedded Linux systems without platform-specific frameworks.
Step 7: Add Swift Concurrency Support
Mark your types as Sendable for safe concurrent use:
public struct GrayskullImage: Sendable {
    // GrayskullImage is Sendable because:
    // 1. It's a value type (struct)
    // 2. Its storage is thread-safe (@unchecked Sendable with locks)
    // 3. The underlying C library operations are thread-safe
}

extension GrayskullImage {
    /// Process image asynchronously
    public func processAsync() async -> GrayskullImage {
        // GrayskullImage can be safely sent across actor boundaries
        await Task.detached {
            return self.sobel().thresholded(128)
        }.value
    }
}
Using Your Wrapped Library
Now you can use the library with clean, safe Swift code:
import Grayskull

// Create an image
var image = GrayskullImage(width: 640, height: 480)

// Set and get pixels using subscript
image[100, 100] = 255
let pixel = image[100, 100]

// Process images functionally
let edges = image.sobel().thresholded(128)

// Use with Swift concurrency
let processed = await image.processAsync()

// Save to file on Linux/macOS
try edges.savePGM(to: "/tmp/edges.pgm")

// Load from file
let loaded = try GrayskullImage(contentsOfPGM: "/tmp/edges.pgm")
print("Loaded image: \(loaded.width)x\(loaded.height)")
Best Practices
1. Safety First
- Validate all inputs (dimensions, coordinates, parameters)
- Use
preconditionfor programmer errors - Use
guardfor runtime errors - Never expose raw pointers in your public API
2. Memory Management
- Use reference-counted storage classes for C resources
- Implement
deinitto clean up C resources - Use
withUnsafePointerpatterns to avoid dangling pointers
3. Thread Safety
- Use locks to protect access to mutable C state
- Make your Swift types
Sendablewhen appropriate - Document any threading restrictions
4. Value Semantics
- Implement copy-on-write for mutable operations
- Use
isKnownUniquelyReferencedto optimize copies - Make your types immutable when possible
5. Ergonomics
- Provide functional-style APIs for chaining operations
- Integrate with platform types (UIImage, CGImage, etc.)
- Use Swift naming conventions, not C naming
6. Testing
- Write comprehensive tests using Swift Testing
- Test memory safety with Thread Sanitizer
- Test concurrent access scenarios
Deploying to WendyOS
Your wrapped library works seamlessly on WendyOS:
# Add as dependency in Package.swift
.package(url: "https://github.com/yourusername/grayskull-swift.git", from: "0.0.1")

# Build and deploy
wendy deploy
The C library compiles natively for ARM64, and your Swift wrapper provides the same safe, ergonomic API across development and deployment.
Publishing Your Package
Now that you've created a useful Swift wrapper, let's publish it as an open source package so others can use it.
Step 1: Prepare Your Repository
Ensure your repository has:
# Standard files
README.md           # Description, installation, usage examples
LICENSE            # Choose MIT, Apache 2.0, or another open source license
.gitignore         # Ignore build artifacts and .DS_Store files
Package.swift      # Your package manifest
Create a good README with:
- Description of what your package does
- Installation instructions
- Basic usage examples
- Link to the C library you're wrapping
- Requirements (Swift version, platforms)
Step 2: Create a Git Tag
Swift Package Manager uses git tags for versioning. Create your first release:
# Commit all your changes
git add .
git commit -m "Initial release"

# Push to GitHub
git push origin main

# Create and push a version tag
git tag 0.1.0
git push origin 0.1.0
Follow Semantic Versioning:
0.1.0for initial development releases1.0.0for your first stable release1.1.0for new features (backwards compatible)1.0.1for bug fixes2.0.0for breaking changes
Step 3: Create a GitHub Release
Use the GitHub CLI to create a release:
# Install GitHub CLI if you haven't
brew install gh

# Authenticate with GitHub
gh auth login

# Create a release from your tag
gh release create 0.1.0 \
  --title "v0.1.0 - Initial Release" \
  --notes "First release of Grayskull-Swift

Features:
- Swift wrapper around Grayskull C library
- Thread-safe image operations
- Functional-style API for image processing
- Support for edge detection, thresholding, and more
- Linux support for embedded systems

Installation:
\`\`\`swift
.package(url: \"https://github.com/yourusername/grayskull-swift.git\", from: \"0.1.0\")
\`\`\`"
Or create it through the GitHub web interface:
- Go to your repository on GitHub
- Click "Releases" in the right sidebar
- Click "Create a new release"
- Select your tag (0.1.0)
- Add a title and description
- Click "Publish release"
Step 4: Add to Swift Package Index
The Swift Package Index is the official directory of Swift packages. Adding your package makes it discoverable and provides documentation hosting.
For Public Packages Only: Swift Package Index is intended for public packages that you wish to share with other developers. It's not the best place for completely closed source packages. If you're building private or proprietary libraries, you can still use Swift Package Manager with private repositories, but skip the Swift Package Index registration.
Requirements:
- Public GitHub repository
- Valid
Package.swiftwith products and at least one target - At least one git tag for versioning
- Open source license
- README with basic documentation
Add Your Package:
-
Enter your repository URL:
https://github.com/yourusername/grayskull-swift -
Click "Add Package"
-
The Swift Package Index will:
- Validate your package structure
- Build documentation from your code comments
- Test compatibility across Swift versions and platforms
- Generate a package page
Optional: Add Package Metadata
Create a .spi.yml file in your repository root to customize how your package appears:
version: 1
builder:
  configs:
    - documentation_targets: [Grayskull]
      swift_version: 6.0
This tells Swift Package Index to:
- Build documentation for the
Grayskulltarget - Use Swift 6.0 for building
Monitor Build Status
Swift Package Index will show build results for your package across:
- Multiple Swift versions (5.9, 5.10, 6.0, etc.)
- Multiple platforms (macOS, Linux, iOS, etc.)
Check your package page at:
https://swiftpackageindex.com/yourusername/grayskull-swiftStep 5: Maintain Your Package
For Bug Fixes:
# Fix the bug, commit changes
git commit -m "Fix edge detection crash on empty images"
git push origin main

# Create patch release
git tag 0.1.1
git push origin 0.1.1

# Create GitHub release
gh release create 0.1.1 \
  --title "v0.1.1 - Bug Fixes" \
  --notes "Fixed crash in edge detection on empty images"
For New Features:
# Add feature, commit changes
git commit -m "Add Gaussian blur support"
git push origin main

# Create minor release
git tag 0.2.0
git push origin 0.2.0

gh release create 0.2.0 \
  --title "v0.2.0 - Gaussian Blur" \
  --notes "Added Gaussian blur filter with configurable kernel size"
For Breaking Changes:
# Make breaking changes, commit
git commit -m "Refactor API to use Result types"
git push origin main

# Create major release
git tag 1.0.0
git push origin 1.0.0

gh release create 1.0.0 \
  --title "v1.0.0 - Stable Release" \
  --notes "Breaking changes:
- Changed error handling to use Result types
- Renamed Image.sobel() to Image.detectEdges()

Migration guide: See MIGRATION.md"
Complete Example: Grayskull-Swift
For a complete, production-ready example of wrapping a C library in Swift, see:
Repository: https://github.com/wendylabsinc/grayskull-swift
This example includes:
- Complete Swift wrapper over C computer vision library
- Thread-safe reference-counted storage
- Platform integration for iOS/macOS and Linux
- Comprehensive test suite
- Swift 6 concurrency support
- Published on Swift Package Index
Learn More
- Official Swift C++ Interop Guide: https://www.swift.org/documentation/cxx-interop/
- Grayskull Interactive Demo: https://zserge.com/grayskull/
- Grayskull C Library: https://github.com/zserge/grayskull
- Grayskull-Swift Wrapper: https://github.com/wendylabsinc/grayskull-swift
- Swift Package Index: https://swiftpackageindex.com/
Next Steps
Now that you understand how to wrap C libraries in Swift and publish them:
- Wrap your own hardware drivers in safe Swift APIs
- Create ergonomic wrappers for robotics libraries
- Build reusable Swift packages for the WendyOS ecosystem
- Publish your packages to Swift Package Index
- Share your wrapped libraries with the community
Remember: working with C and C++ is inevitable in embedded Linux development, but you don't have to sacrifice memory safety and ergonomics. Swift's excellent interop lets you have both.